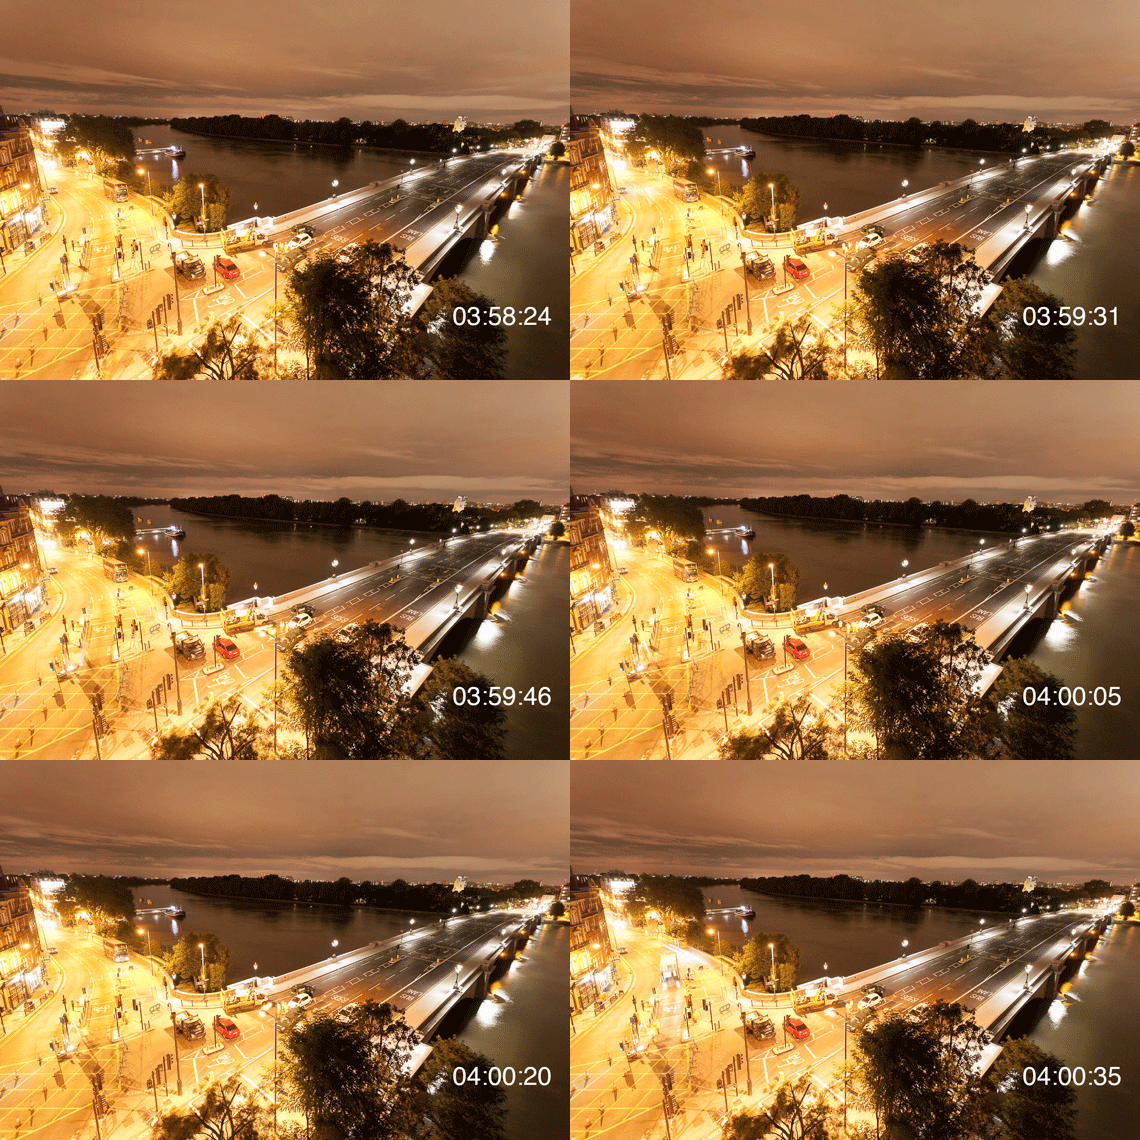
Sometimes I like to put a timestamp, or clock, on to my time-lapse sequences, just because it’s a fun and useful thing to be able to see the time elapsed as you are watching the video. Now, Lightroom used to have a great way of doing this with very little fuss and bother in the Slideshow module (you can read all about it in this blog post), BUT this function was effectively broken with the release of Lightroom 5. There are supposed to be workarounds, but they just make my Mac very unhappy indeed, and the slideshow to video export in Lightroom 5 just doesn’t work as it did before.
An alternative is to use the Mogrify plugin to stamp the time and date of the photo onto every image in your sequence on export. This is great, but Mogrify won’t let you edit the format of date-time tag; it’s <date> <time> or nothing. Well, I don’t want the date, just the time.
So what can you do? Well, I looked at the tools that I had to hand and after many cups of tea came up with the following solution. It’s a little bit involved, but I’ll summarise it for you first then take you through the detail.
This technique uses Photoshop’s data-driven graphics capabilities to read data from a file and stamp the time of each photo onto every image to be used in the time-lapse sequence. I’ll write more about the joys of data-driven graphics in a separate blog post next week, but meanwhile, in summary, one way of adding a timestamp to a video sequence is to do the following:
- use the ListView plugin in Lightroom to make a text file of image names and the times that they were taken. This is the data file which will be used by Photoshop.
- use Photoshop to read the times from data file and add the time as a layer on to every image in the sequence.
- convert the resulting PSD files to JPG.
- load the jpg files into into After Effects, Photoshop or Quicktime to make the time-lapse video.
And now for the detail.
First, in Lightroom…
- Export your timelapse sequence to jpg
- Import the jpgs back into Lightroom
- Buy,download and install a copy of John Beardsworth’s ListView plugin for Lightroom from the Photographer’s Toolbox: http://www.photographers-toolbox.com/products/jbeardsworth/listview/
- In Lightroom select every image in your time-lapse sequence and use the ListView plugin to generate a list of times for the images. In ListView make sure that you also display and download the path of the files, which will also include the filename.
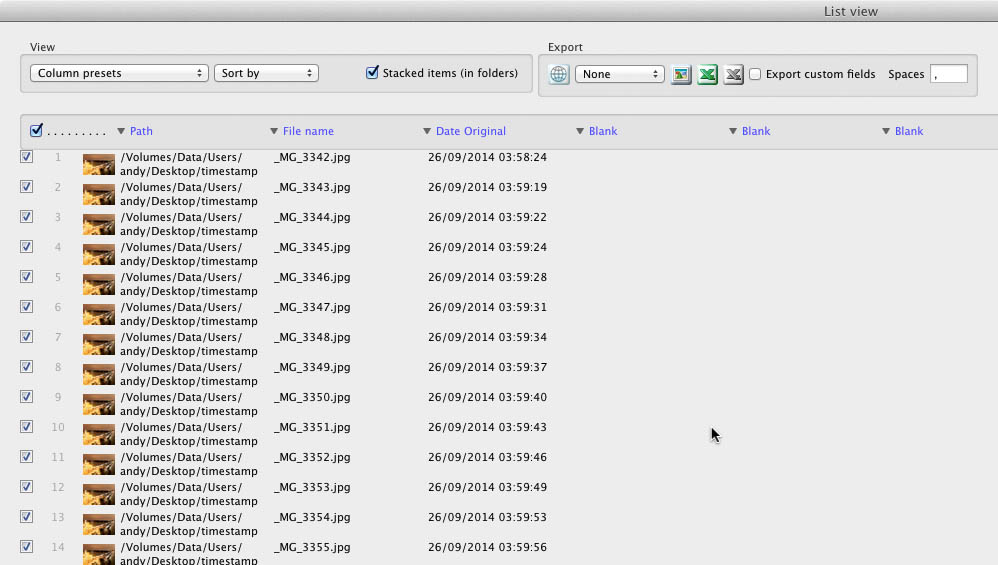
- Export this list to an Excel csv file. The file will be called List View.csv, and will probably be created in your Pictures directory.
- Edit the file using the text editor of your choice. Use the Find/Replace function search for and remove the date, leaving just the time. Don’t forget to also delete the space between the date and time.
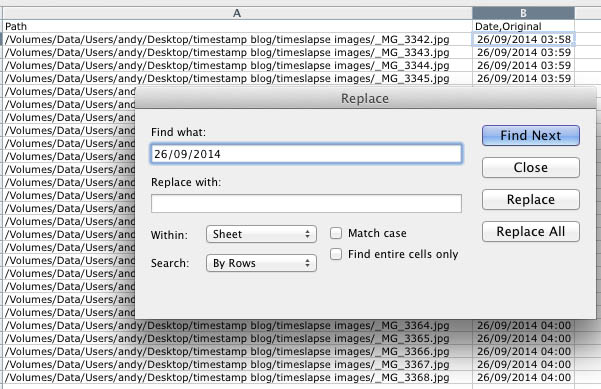
- Lastly, rename the column headings in your data file. Choose something meaningful, like “filename” and “time”, as you will be using these exact names later on in Photoshop. You should now be left with a text file containing two columns, the file name (including path) and the times that the images were created.
Next, we move over to Photoshop…
- Create a new Photoshop document of exactly the same pixel dimensions as your timelapse images.
- Double-click on the Background Layer and rename the layer. Give this layer exactly the same name as your filename heading in your data file, e.g. if the filename column in your data text file has a heading of “filenames”, then the layer in Photoshop should be named “filenames” as well.
- Add a new layer and give it exactly the same name as the time column from your data file, then use the Text tool to create and format some text. This will act as a placeholder for the timestamp on the images.
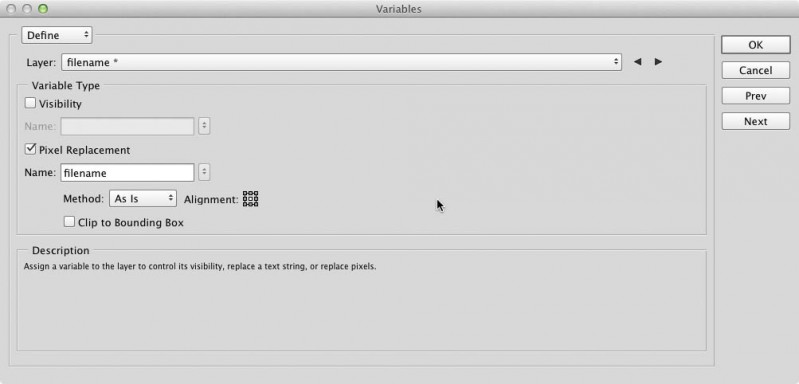
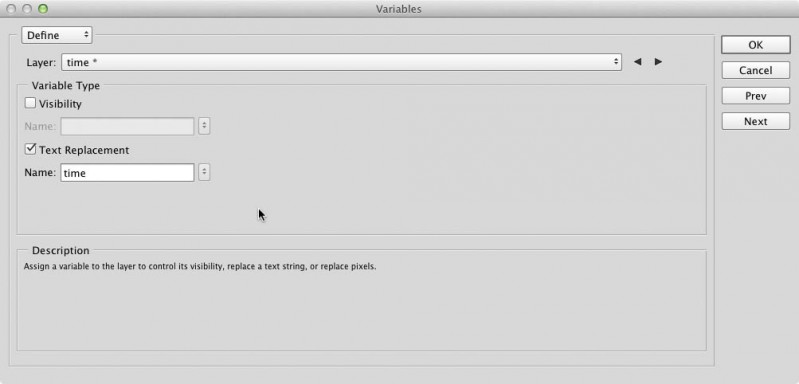
- Now we link the layers in our Photoshop file to our data file. Select Image > Variables > Define…, select the image layer from the drop-down box, and check the Pixel Replacement box. Type the name of your filename column in the Name box. It is very important that the names of your data columns, layers and data variables all match up. Select how you want your image to fill the background layer. As we have sized the Photoshop document to the same size as the timelapse image then you can just select “As Is”.
- Select the time text layer from the drop-down list. Check the Text Replacement box, and make sure that the Name is the same as your time column in your data file.
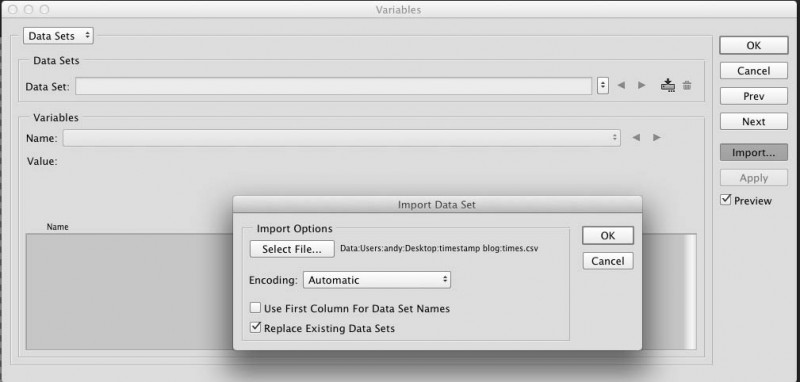
- Now select Data Sets from the drop down list at the top. Select Import… from the right, and select your data file.
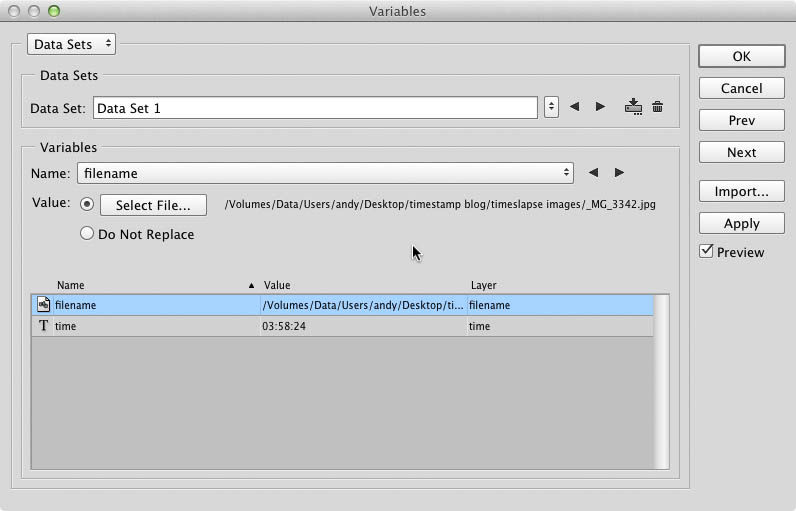
- You should see an example of the data set appear in the window. If you check the Preview box then you ought to one of your timelapse images and the timestamp in the main Photoshop document.
- Make sure that your PS document is saved.
Almost there. Now we merge the data…
- Select File > Export > Data Sets as Files…
- Select an output folder where all of the timestamped psd files will be stored.
- Make sure that the “All Data Sets” option is selected in the Data Sets drop-down lists
- Use the file naming options to choose the format for the new file names.
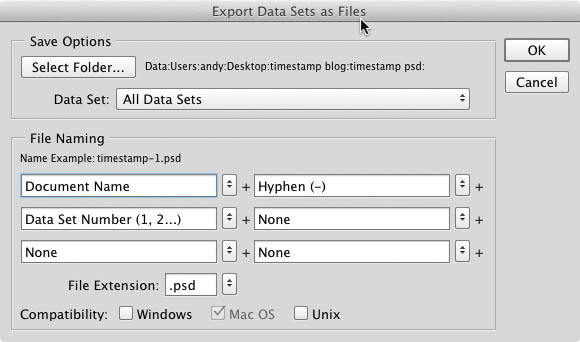
- Hit OK, and sit back while the times of every file are added as a text layer to their corresponding images.
Finally!
Now you have a folder full of psd files, but you need jpg, so…
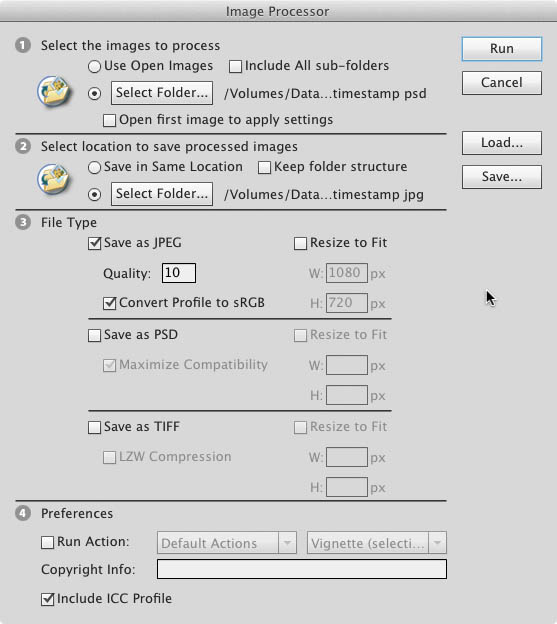
- Select File > Scripts > Image Processor… Select the folder containing your psd’s, select an output folder, and lastly select jpg as the file type. Hit Run, and wander off for a bit while your jpgs are created.
Finally, finally, finally…
Now you have a folder of timestamped jpegs, just ripe for a timelapse sequence. Just open in Photoshop, After Effects or Quicktime Pro as an image sequence. All done.
Leave a Reply